Document Requests
Document requests are how parent organizations request specific documents from their third parties, and how third parties respond.
Creating Document Requests
Parent organizations: Use document requests to collect compliance documents from your partners.
Anatomy of a Document Request
Understanding the parts of a document request:
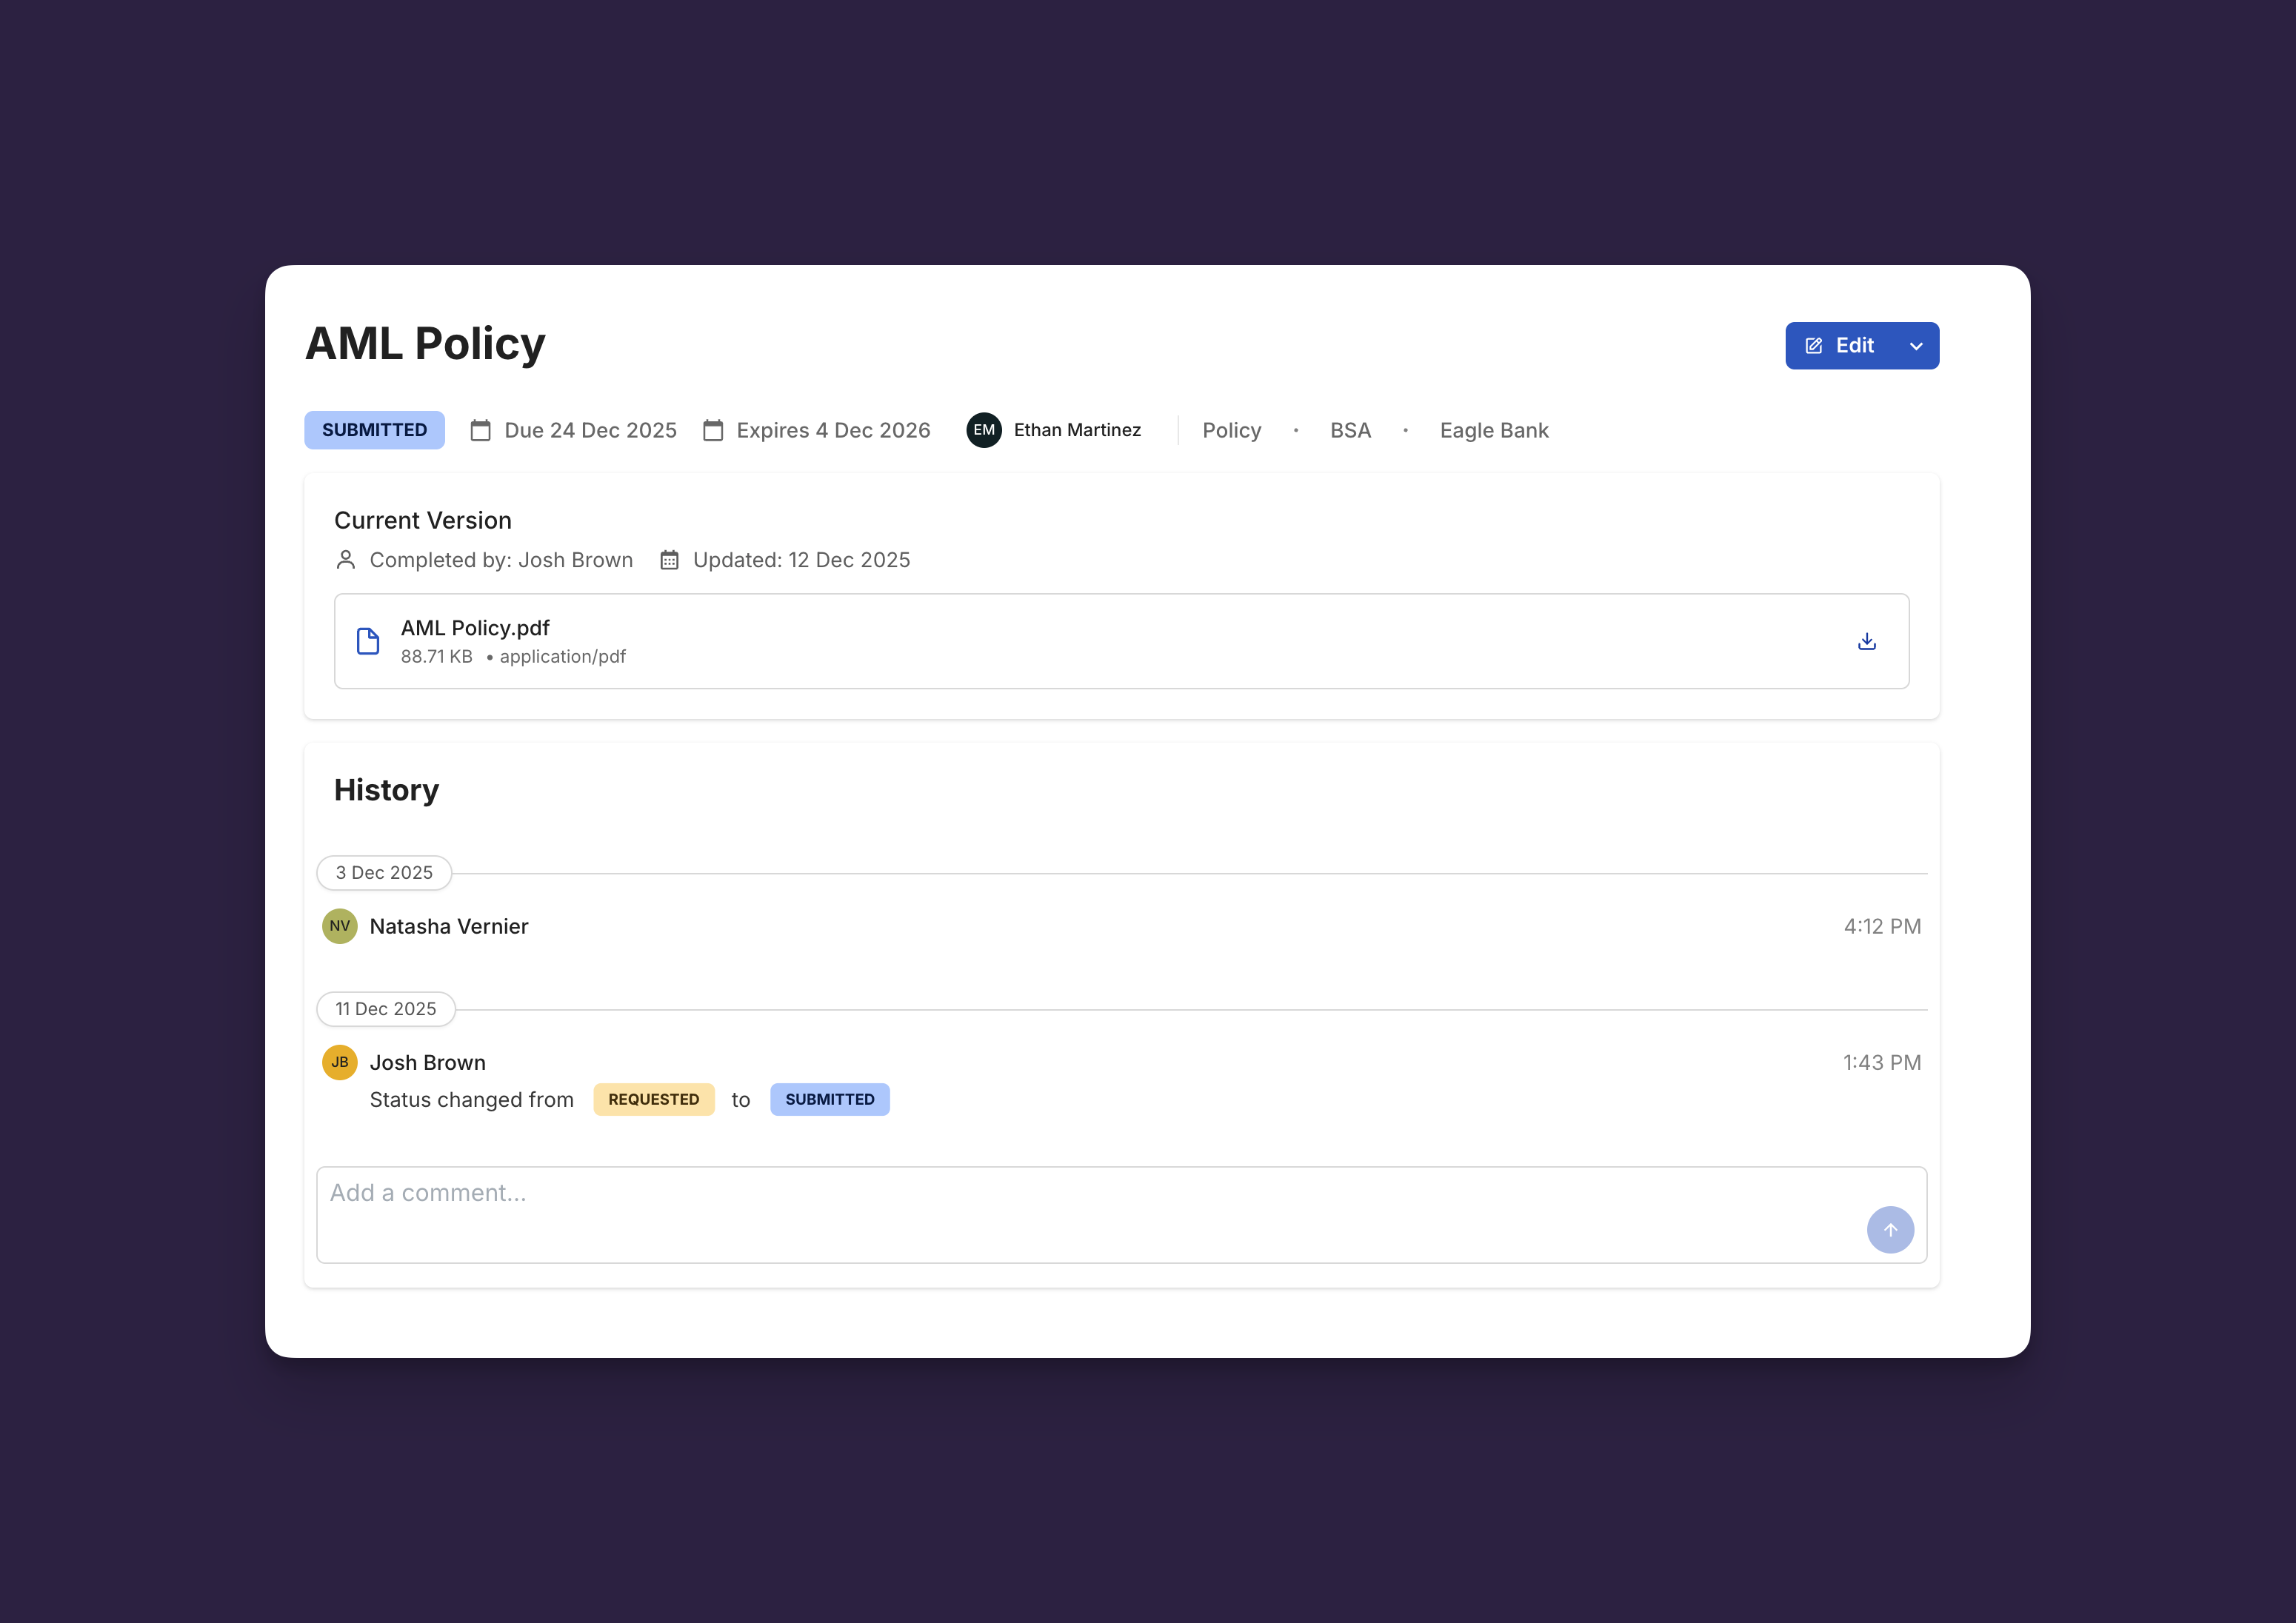
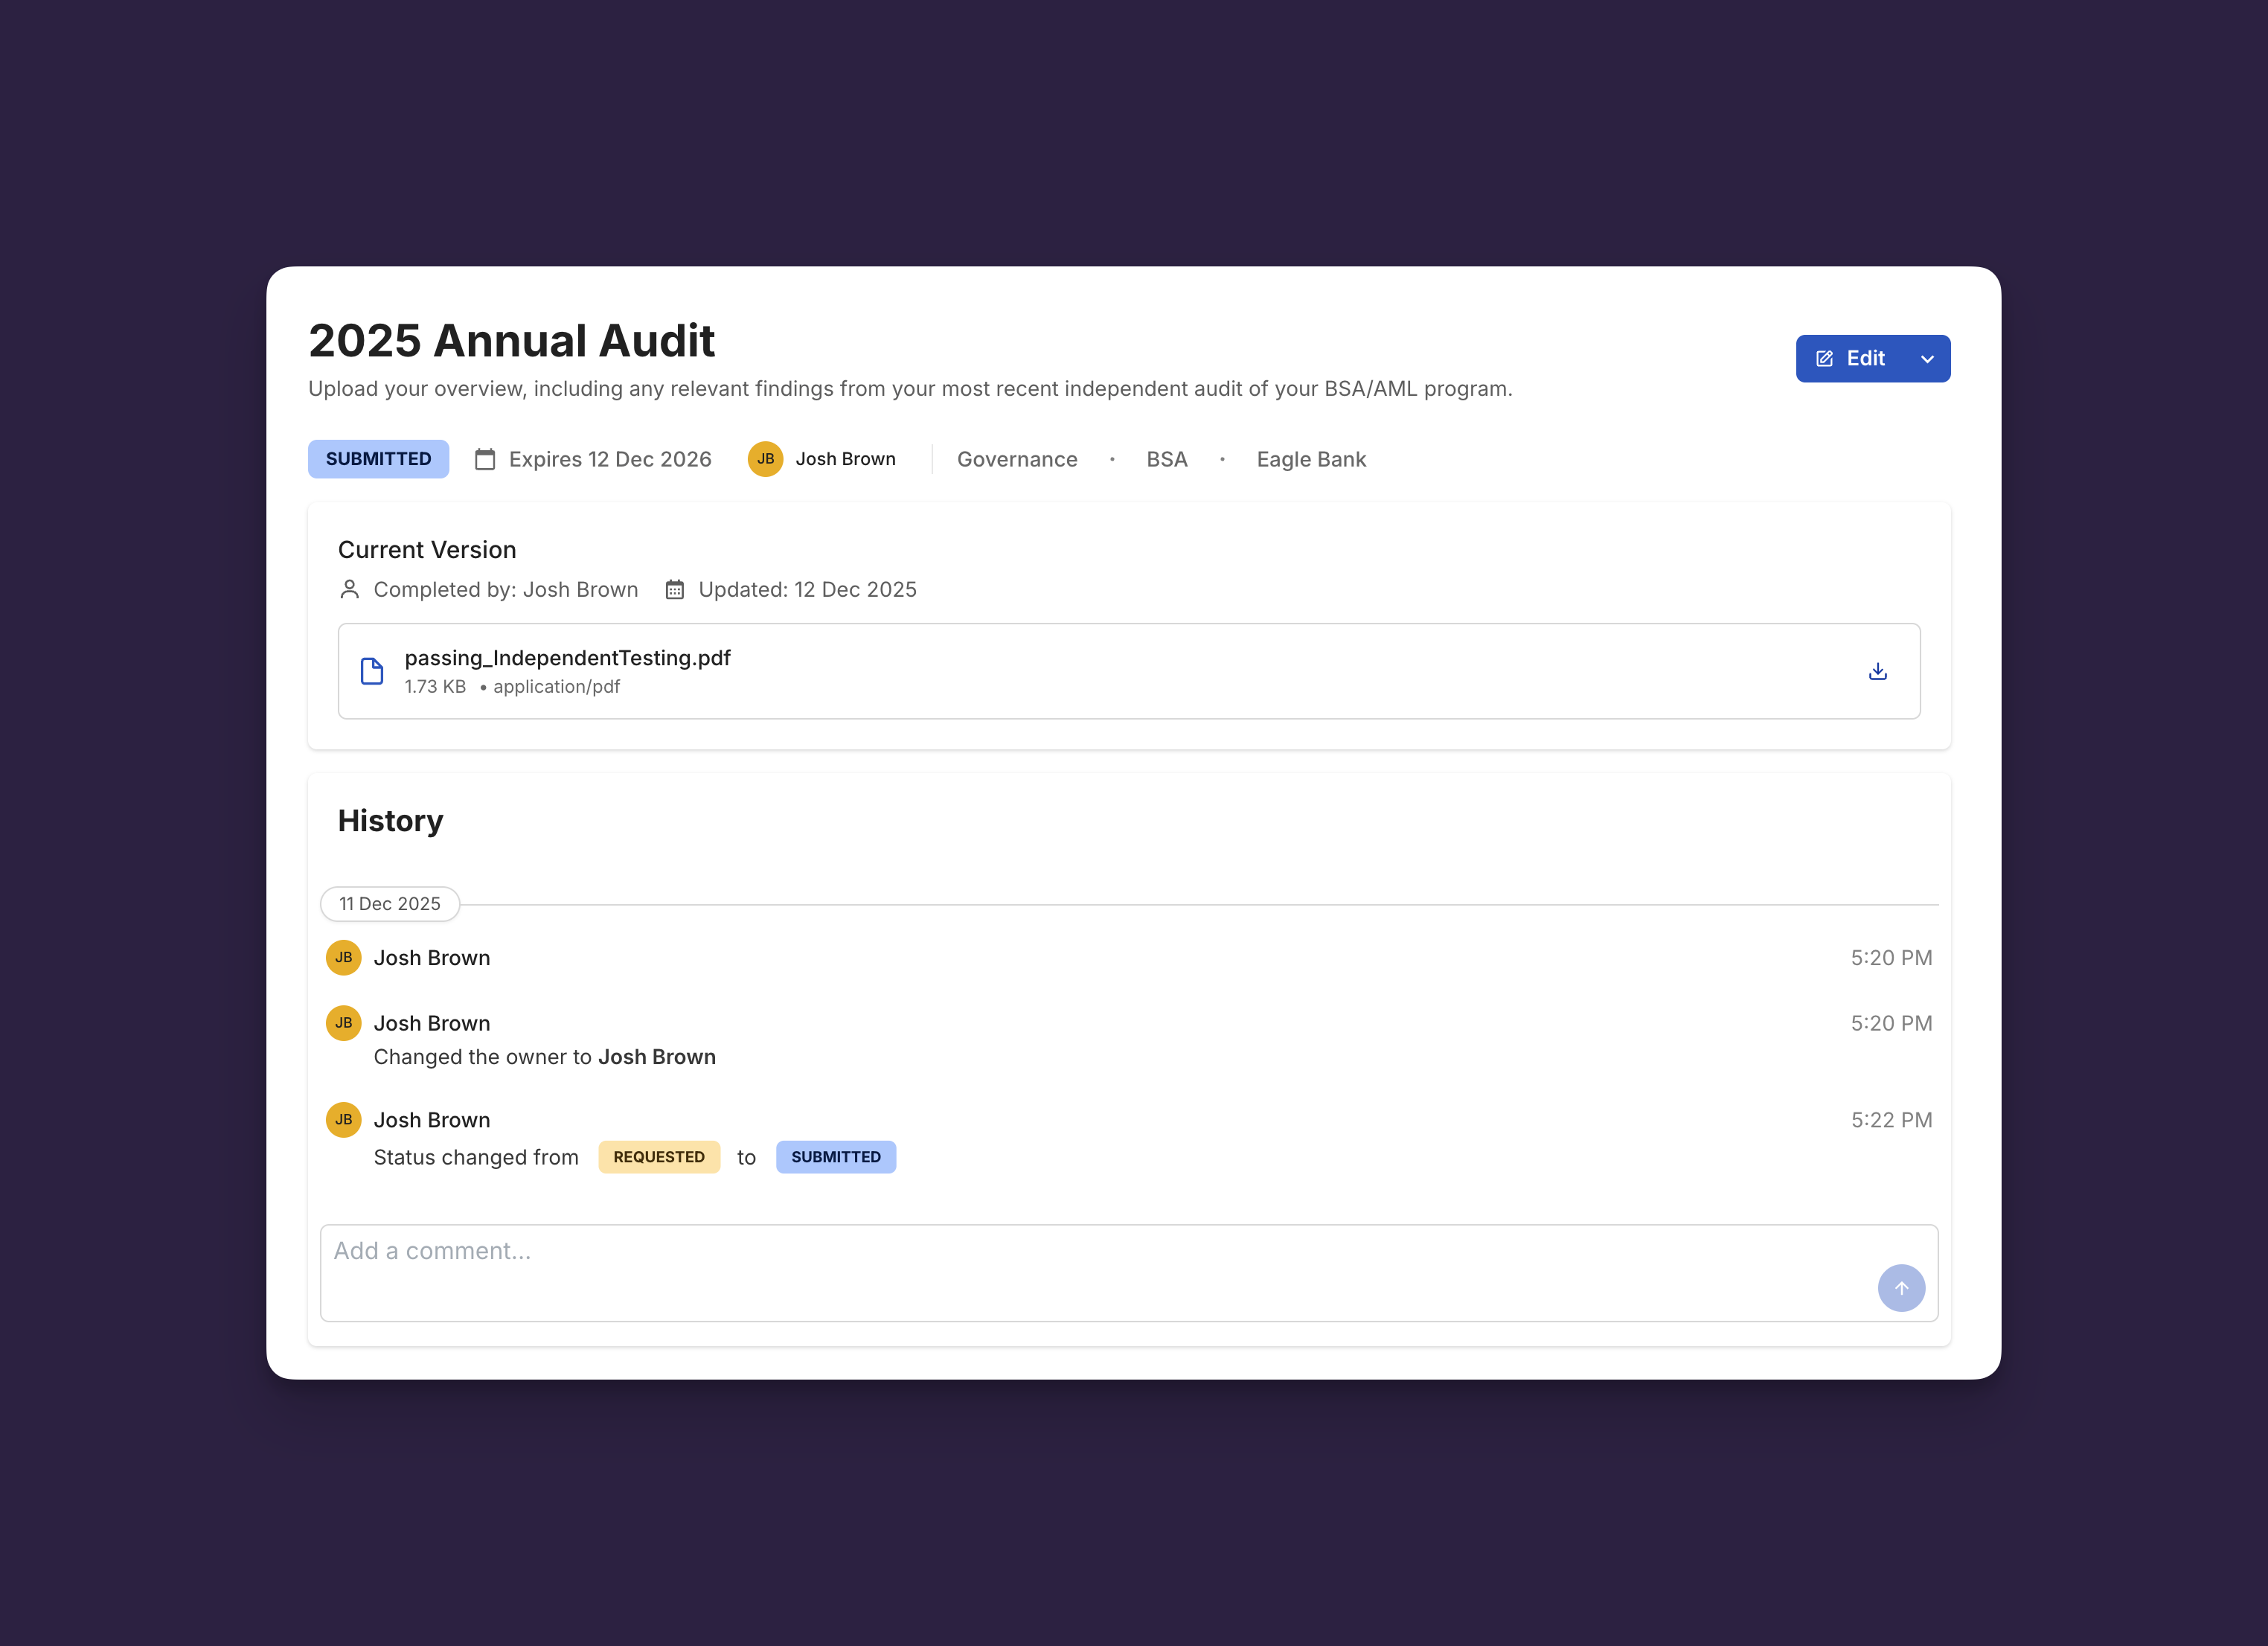
- Document Name - What is being requested
- Description - Detailed requirements and expectations from requesting organization
- Organization - Which partner must fulfill this request
- Status - Current state (see status reference)
- Due Date - Deadline for submission
- Expiration Date - When approved document expires
- Owner - Person responsible for fulfilling (optional, can be assigned by either org)
- Attached Documents - Submitted files with version history
- Comments - Collaboration thread with @mentions and full history
- History - Complete audit trail of all status changes and actions
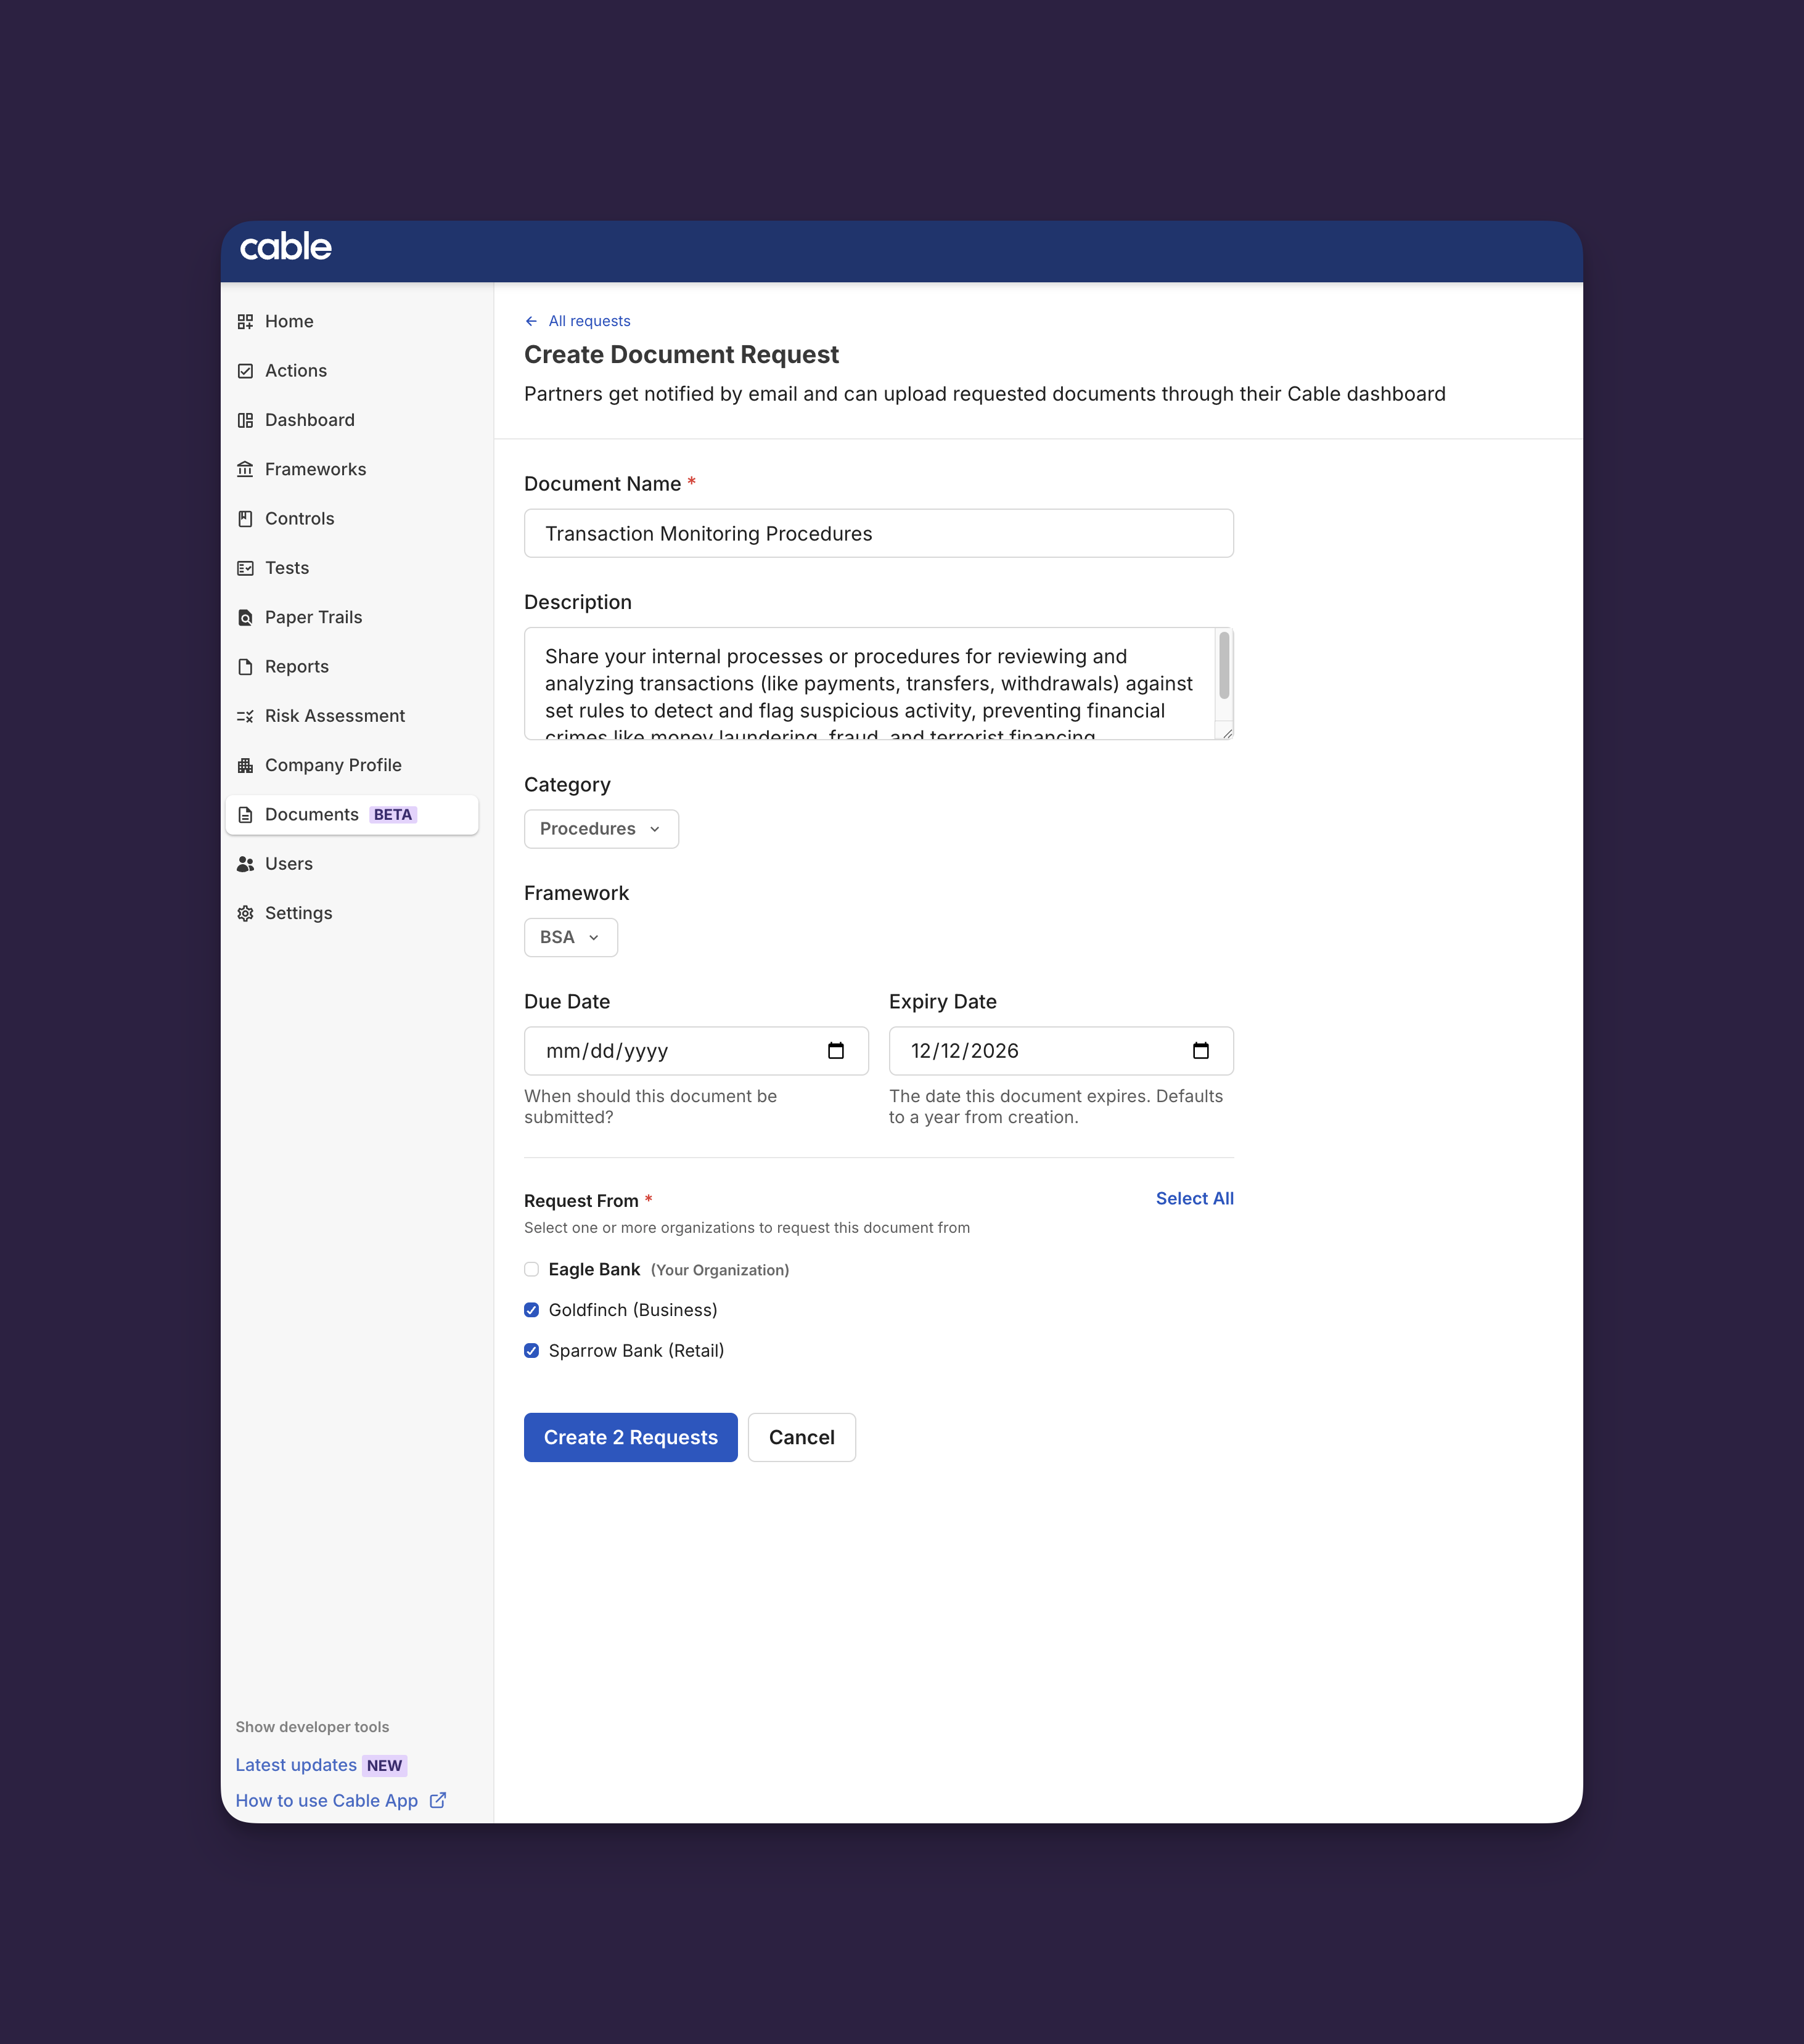
To create a document request:
- Navigate to Documents → Requests
- Click Request Document
- Fill in the request details:
- Document Name (required) - What you’re requesting (e.g., “AML Policy”)
- Description (optional) - Detailed requirements about what must be included
- Category (optional) - Policy, Procedure, Governance, IT/Security, HR, Finance, or Other
- Due Date (optional) - When the document is due
- Expiration Date (optional) - When the approved document expires (defaults to 1 year)
- Select which partner organizations should receive this request
- Click Create X Request(s) (where X is the number of organizations selected)
💡 Tip: Include detailed descriptions of what you need. For example, if requesting a policy, list specific sections or topics that must be covered. This reduces back-and-forth and ensures you get the right documents.
✅ Success: You’ll see “Created [X] request(s) successfully” and you’ll be returned to the Requests tab.
What happens next:
- Partners receive notification of the request
- Request appears in their Documents → Requests tab with REQUESTED status
- You can track status from your Documents → Requests tab
Responding to Document Requests
When you receive a document request, you have two ways to fulfill it.
View Incoming Requests
Navigate to Documents → Requests to see all requests for your organization. Each request shows:
- Document name and description
- Requesting organization
- Status (see Understanding Request Status)
- Due date
- Expiration date (when applicable)
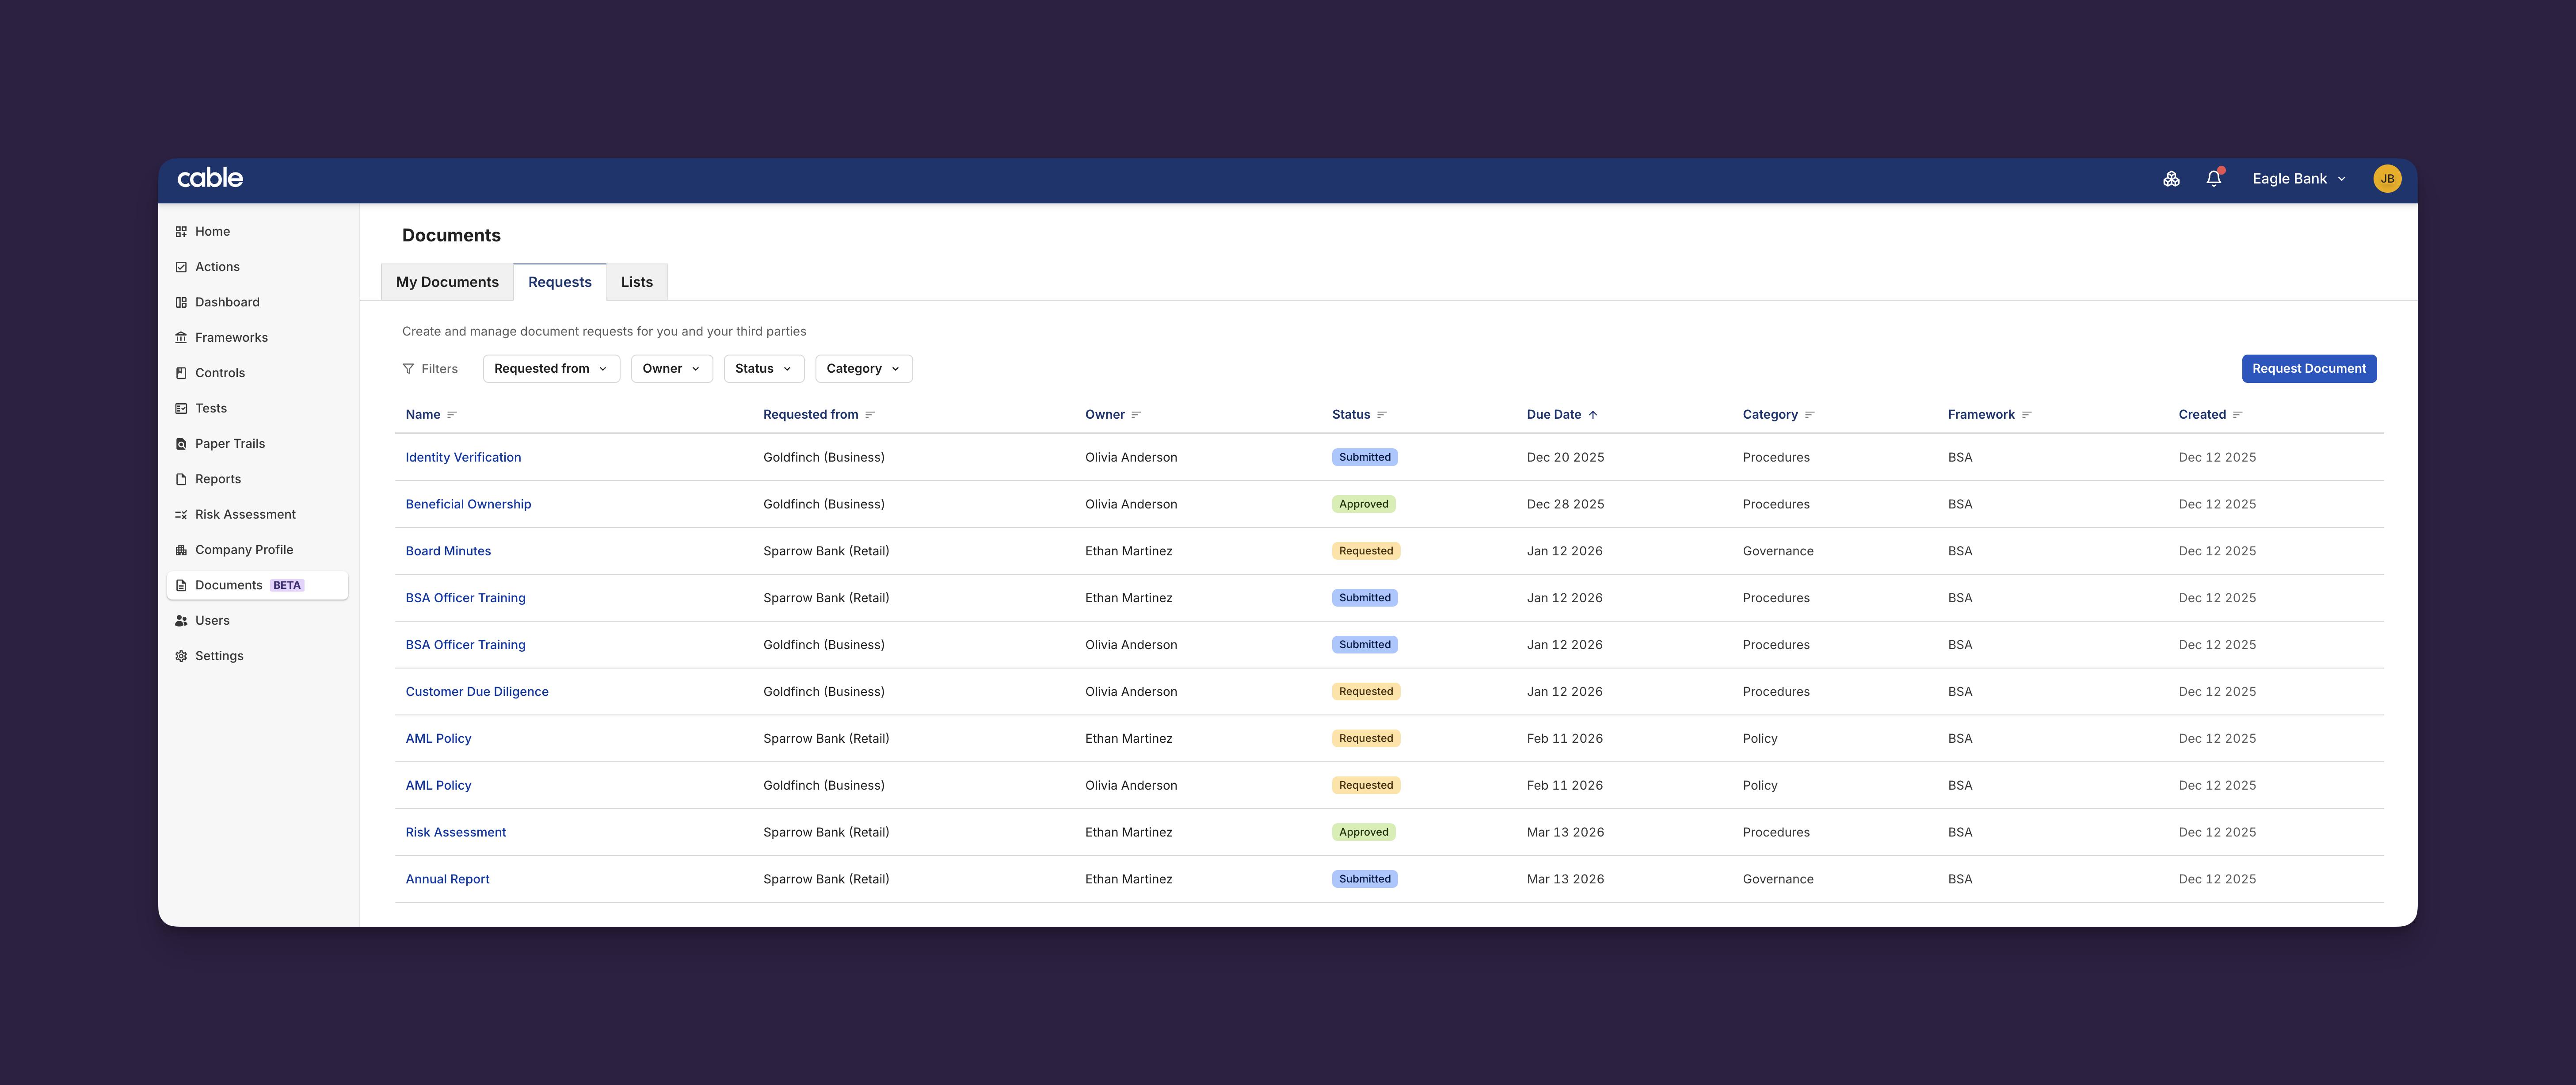
Requests are initially marked with color-coded status badges:
- REQUESTED - Waiting for your response
- OVERDUE - Past due date
Option 1: Attach Existing Document
If you already have the document in your library:
- Click on the request
- Click Attach from Library
- Select the document from your library
- Click Attach
✅ Success: You’ll see “Submit successful - Document request submitted successfully.” Status automatically changes to SUBMITTED.
💡 Tip: Always check your Document Library first before uploading a new document. If you already have the document in your library, simply attach it to save time and maintain version consistency.
Option 2: Upload New Document
If you don’t have the document in your library:
- Click on the request
- Click Upload new version
- Drag and drop your files or click to browse
- Add document details (name, description, notes)
- Click Submit file
✅ Success: You’ll see “Upload successful - Documents have been uploaded successfully.” Status automatically changes to SUBMITTED.
The document is also added to your library for future use.
Adding Comments and Questions
Need clarification? Add a comment to the request:
- Open the document request
- Scroll to the History section
- Type your comment or question
- Use
@usernameto mention specific people - Click Post Comment
Both your organization and the requesting organization can see and respond to comments.
Reviewing and Approving Requests
After your third party submits a document, review and approve it.
Track Request Status
Navigate to Documents → Requests to see all requests you’ve created. Filter by:
- Status (Submitted, Reviewed, Approved, etc.)
- Owner
- Requestor
- Category
Requests awaiting your review show SUBMITTED status.
Review and Approve a Submission
To approve a submitted document:
- Click on the request with SUBMITTED status
- View the attached documents and files
- Review the document content
- Select Approve from the dropdown in the top right of the page
✅ Success: You’ll see “Approve successful - Document request approved successfully.” Status changes to APPROVED.
To request changes:
- Click Request Changes
- Add a comment explaining what needs to be revised
- Click Submit
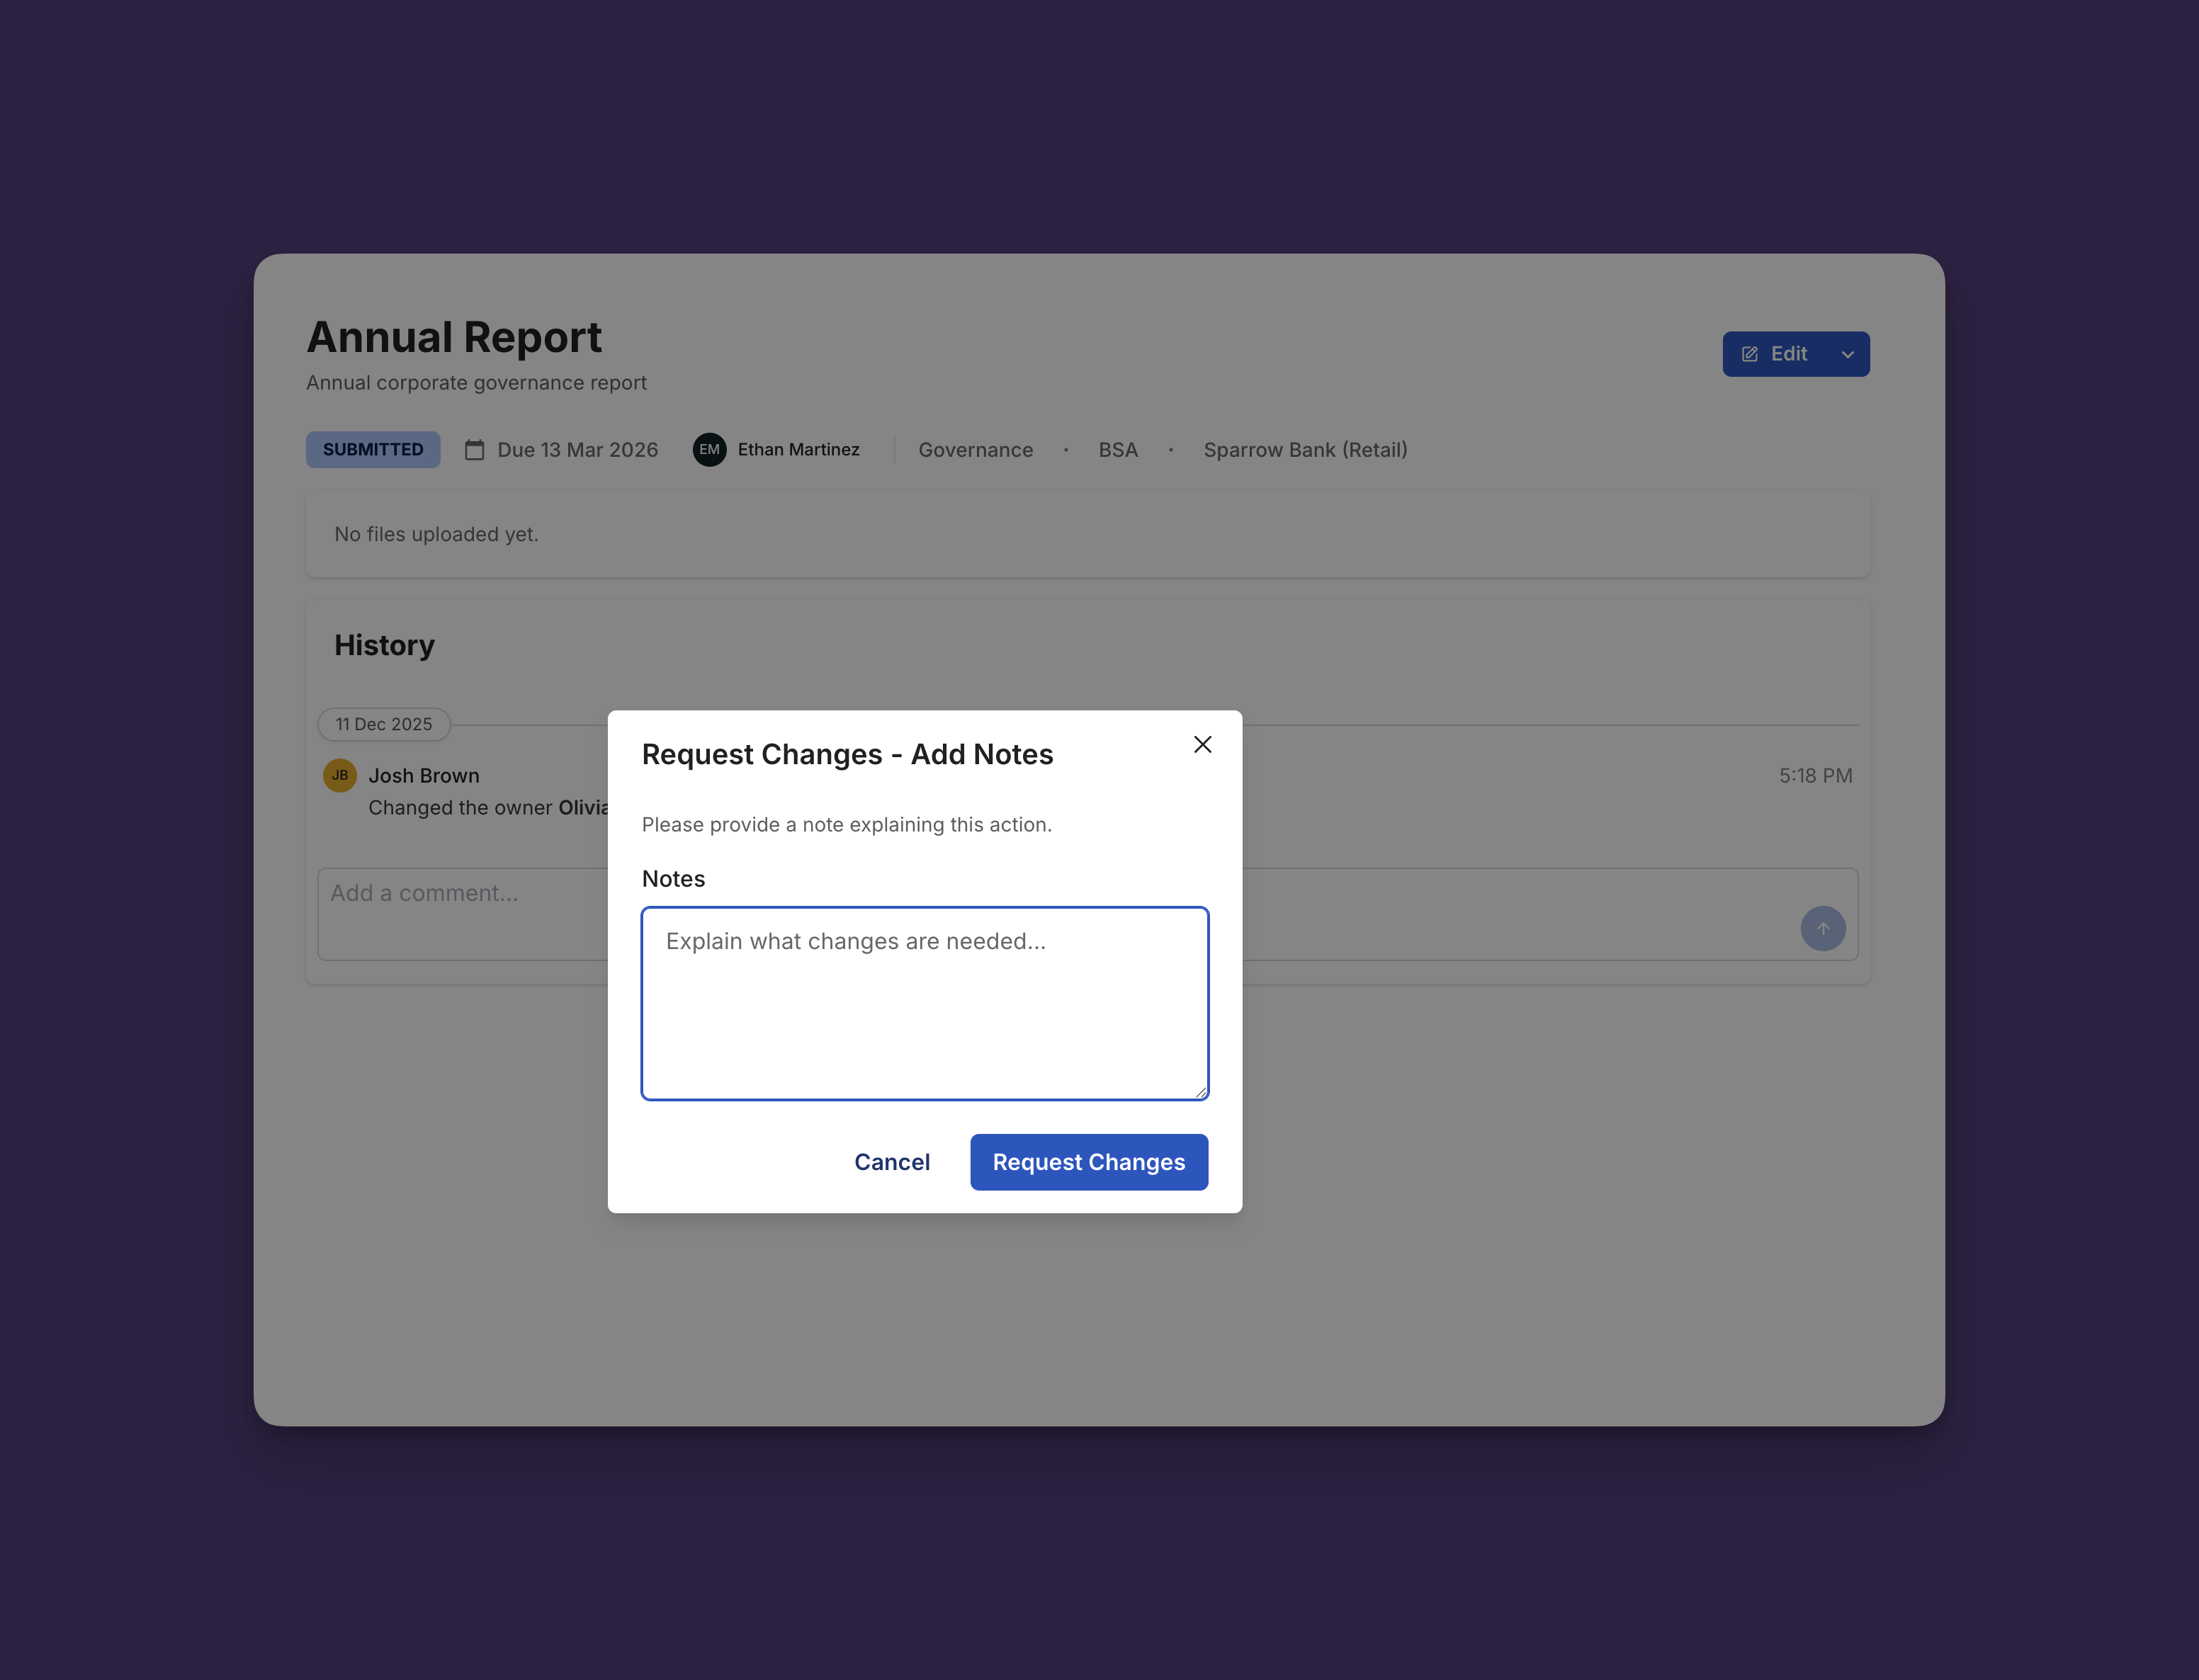
Status changes to REQUESTED and partner is notified. They can then upload a new version or attach a different document.
Understanding Request Status
Document requests move through different statuses based on actions from both organizations: